1. How the settings fit together
A game holds card attributes, a deck structure and a board design. Cards and decks belong to that game, and the board has places to put cards, called "zones", plus quick actions.
| Term | Meaning |
|---|---|
| Attribute | Information on each card, such as color or cost |
| Pile | A group of cards, such as the main deck |
| Zone | A place on the board, such as the deck, hand or field |
| Slot | A space inside a zone. Cards can also stack in one slot |
| Starting position | Which zone each pile of the deck is placed in when a game begins |
2. Design the board
Edit the game in "Game setup" and open "Board design". Move and resize zones, and long-press one to open its detailed settings.
| Demo zone | Settings | Purpose |
|---|---|---|
| Deck | Each player, 1 slot, face down | Keep 30 cards in one pile |
| Hand | Each player, 1 slot, face up, spread out | Read your hand |
| Field | Each player, 5 slots, face up | Line up cards in 5 places |
| Life | Each player, 1 slot, face down, sideways, offset | Stack face-down cards |
| Discard | Each player, 1 slot, face up | Gather used cards |
| Field (shared) | Shared, 1 slot, face up, sideways | A place both players share |
You can also adjust position, width and height, rows and columns, how cards line up, how stacks are shown, whether moved cards go on top or bottom, and the rotation step. Each zone's starting state can be "Face up", "Face down" or "Ask each time". With "Ask each time", you choose face up or down every time you move a card there (for games where you play a card face down and reveal it later). When a game starts and when quick actions run, cards are placed face up or down as chosen before. If you use a shared zone, also set aside the share of the table for it.
In zone editing, use  add to create more places, and
 delete to remove the selected zone.
| Feature | When to use it |
|---|---|
| Reuse an existing design | From the board design field on the game's edit screen, copy another game's board to start from. |
| Same slot size everywhere | Turn this on in the zone editing menu to make card sizes, which can differ by zone, match the smallest zone (shared zones excluded). |
3. Create card attributes
| Type | Use |
|---|---|
| Text | Any string |
| Number | Cost, power and so on |
| Select | A single category, such as type |
| Multi-select | Categories a card can have several of |
| Boolean | Yes or no |
The key is the identifier that matches attributes up; the label is the name shown on screen. In the demo, color and type are "Select", and cost and power are "Number".
With "Show on cards during solo play", choose which zones show the attribute and where. For example, you can show the demo card "Moltencrown Beast"'s power of 9000 at the top right only while it is on the field.
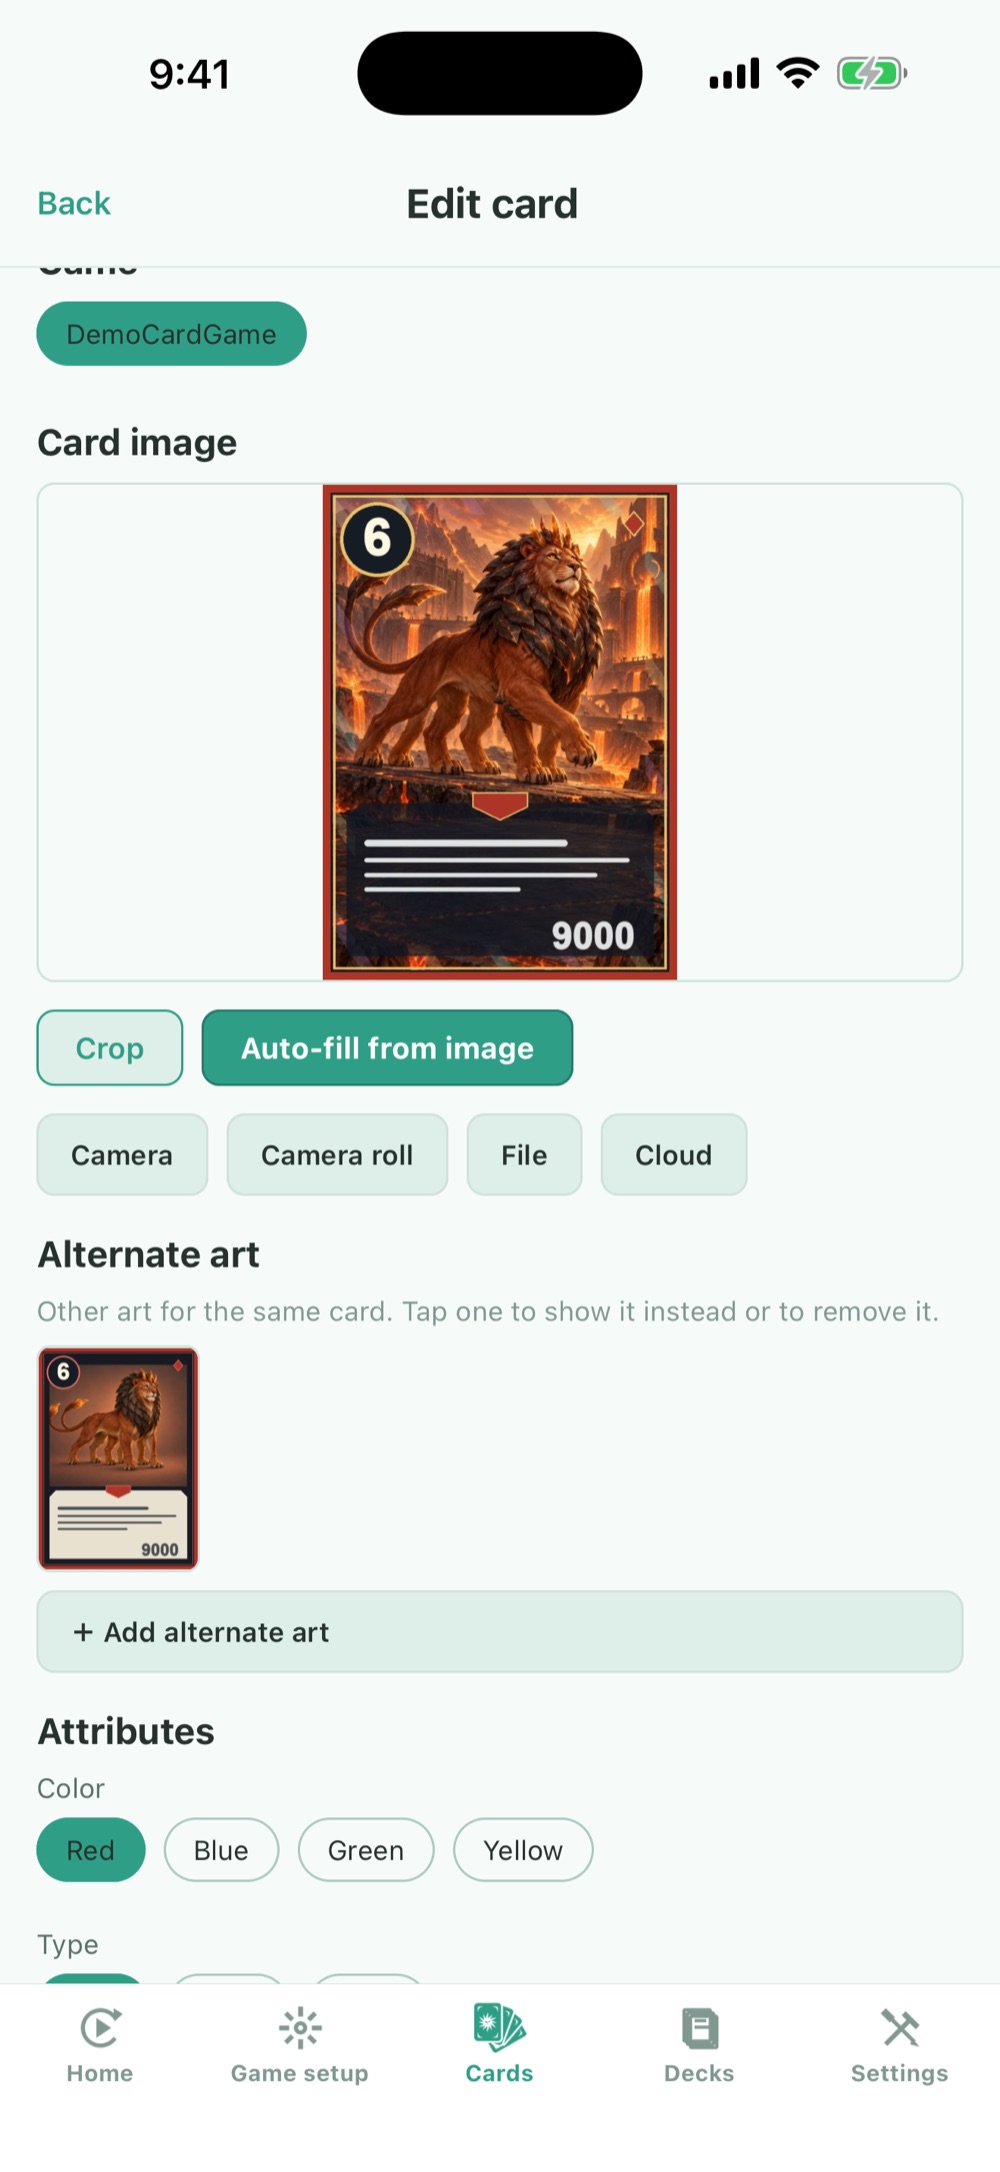
Tap an image to enlarge it. The screens are demos for explanation.
4. Set piles and starting positions
- In the deck structure, set each pile's name, minimum and maximum card count. The demo has a main deck of 30.
- Set the starting position to the "Deck" zone on the board.
- If you use several piles, do the same for each.
- Save a deck, start a new game, and check that the cards land where you expect.
To limit cards by type, set a select attribute as the card type, then set the allowed types and per-type limits. If a deck has its own board and starting positions, those take priority over the game's defaults.
5. Create quick actions
Open "Quick actions" from the board design. You can set up shuffle, move, set face, set orientation and sequences.
| Demo button | What it does |
|---|---|
| Draw 1 | Deck → hand, 1 card, face up |
| Game start | Shuffle the deck → 5 cards to life, face down → 5 cards to hand, face up |
| Turn start | Set the field upright → draw 1. Runs automatically except on the first turn |
| Damage | Life → hand, 1 card, face up |
- Start by creating one "Move": choose the source, destination, count and face.
- Give it a label, save, and check the result on the play screen.
- For several actions, line them up in order in a "Sequence".
- For automatic runs, choose every turn, first turn only, or except first turn, and check both the first player's and the opponent's turns.
You can also use "All", "Except the top card" and "Decide how many cards to move from a card's attribute value". For zones with several slots at the destination, set "Placement at destination" to "One per empty slot" to lay cards out one per slot (for example, lining up side cards or shields). Attribute references use the top card of the zone you specify. A "Sequence" cannot contain another "Sequence". The first turn means the first turn of the game, which is not necessarily each player's first turn.
For a button's look, you can choose pictures such as  draw,
 shuffle or
 sequence. The icon and what the button does are set separately. During play, open the panel with "◀" at the right edge and long-press a button to check its steps.
Create quick actions with AI
For games with a board design, "Create quick actions with AI" appears in the game setup list. As with creating a game setup with AI, copy the discussion prompt and format instructions, paste them into the AI you use, then paste what it returns to import it. Suggestions only use the zones and attributes in that game. If you describe your game's rules, the AI also suggests setup and turn-start actions, including when they run automatically (every turn, first turn only, or except first turn). After importing, check how they work on the play screen.
6. Decide what is revealed online
| Example zone | List of contents | Face-up cards |
|---|---|---|
| Deck | Hidden | Shown to the opponent too |
| Hand | Hidden | Owner only |
| Field | Shown | Shown to the opponent too |
Face up or down and what is revealed are separate settings. Decide them to fit your rules, and check what each side sees on two devices online. Do not judge by how the opponent's hand looks in Solo Play alone.
7. Save and check
- Each pile is placed where you expect.
- Face, rotation and stacking when moving work as intended.
- Attributes show where you need them.
- Quick action counts, order and automatic runs are correct.
After changing settings, check again in a new Solo Play. For sleeves and playmats, check the conditions on each screen before setting them.