1. Choose your starting point
| What you have | How to start |
|---|---|
| A custom QR code or share code from someone | Import shared game |
| You know the zones and deck size you need | Create with guided setup |
| You want to work out the setup by talking it through | Create with AI |
You only need one of the three. After that, register images or a card ZIP.
2A. Use someone's QR code
- In "Game setup", open "Import shared game".
- Scan a QR code shown on another device with the camera. If the image is saved on the same phone, choose it with "Read QR from image".
- If you have a share code or link, paste it into the field.
- After importing, open the game and check that the board and deck size match what you want to play.
To share your own game setup, tap "Share" on that game in the "Game setup" list. Have the other person scan the QR code on screen, or send it with "Share as image" or "Share link". Attributes, rules and board design are shared; card images are not included. If the setup is too large for a QR code, use the link or code.
2B. Create with guided setup
Open "Game setup" → "Create with guided setup" and answer the questions. You do not need to match the numbers in the examples.
| What you decide | Demo example | In your game |
|---|---|---|
| Game name | DemoCardGame | A name that is easy to tell apart |
| Zones | Deck, hand, field, life, discard | Choose the zones you use |
| Field slots | 5 slots | As many as you want to line up |
| Shared zone | One field | Add only if needed |
| Card attributes | Color, type, cost, power | What you want to track. You can add these later |
| Deck structure | Main deck of 30 cards, placed in the deck zone | Decide the count and where each pile starts |
In the app, the zones are listed as "Deck area", "Character area", "Life / Shield area", "Discard area" and "Hand area". Choose the ones you use and rename them on the spot. The demo renames them to "Deck", "Field", "Discard" and so on. Along the way you can also choose whether to count life as a number (Counting life).
Check the layout and save. You can add or edit quick actions later. Make sure to check where each pile starts, since that is where its cards are placed when a game begins.
2C. Create with AI
- Open "Game setup" → "Create with AI".
- Copy the discussion prompt and paste it into a chat with the AI you use.
- Talk through the zones, attributes, and the deck's piles and counts. The AI is already told the basic shapes, such as the deck (one slot, cards stacked without offset) and the hand (one slot, cards side by side, overlapping when they do not fit), so you only need to discuss what you want to change for your game.
- Once you have decided, copy the TCG-T format instructions and paste them into the same chat.
- Paste the setup data the AI returns into TCG-T and validate it.
- Fix any errors, check the content and layout, and create the game.
3A. Register images from your device or cloud
- In "Cards", choose the game to add to and tap "+ Add".
- Pick photos from "Camera roll", or files on your device or in the cloud from "File". If you only have a share link to an image, save it to your device or a storage location you can open first.
- Crop as needed. If one image contains several cards, use the cut-out or grid split.
- Check the card name and the attributes you need in the draft, then save. A set number is optional when registering from images.
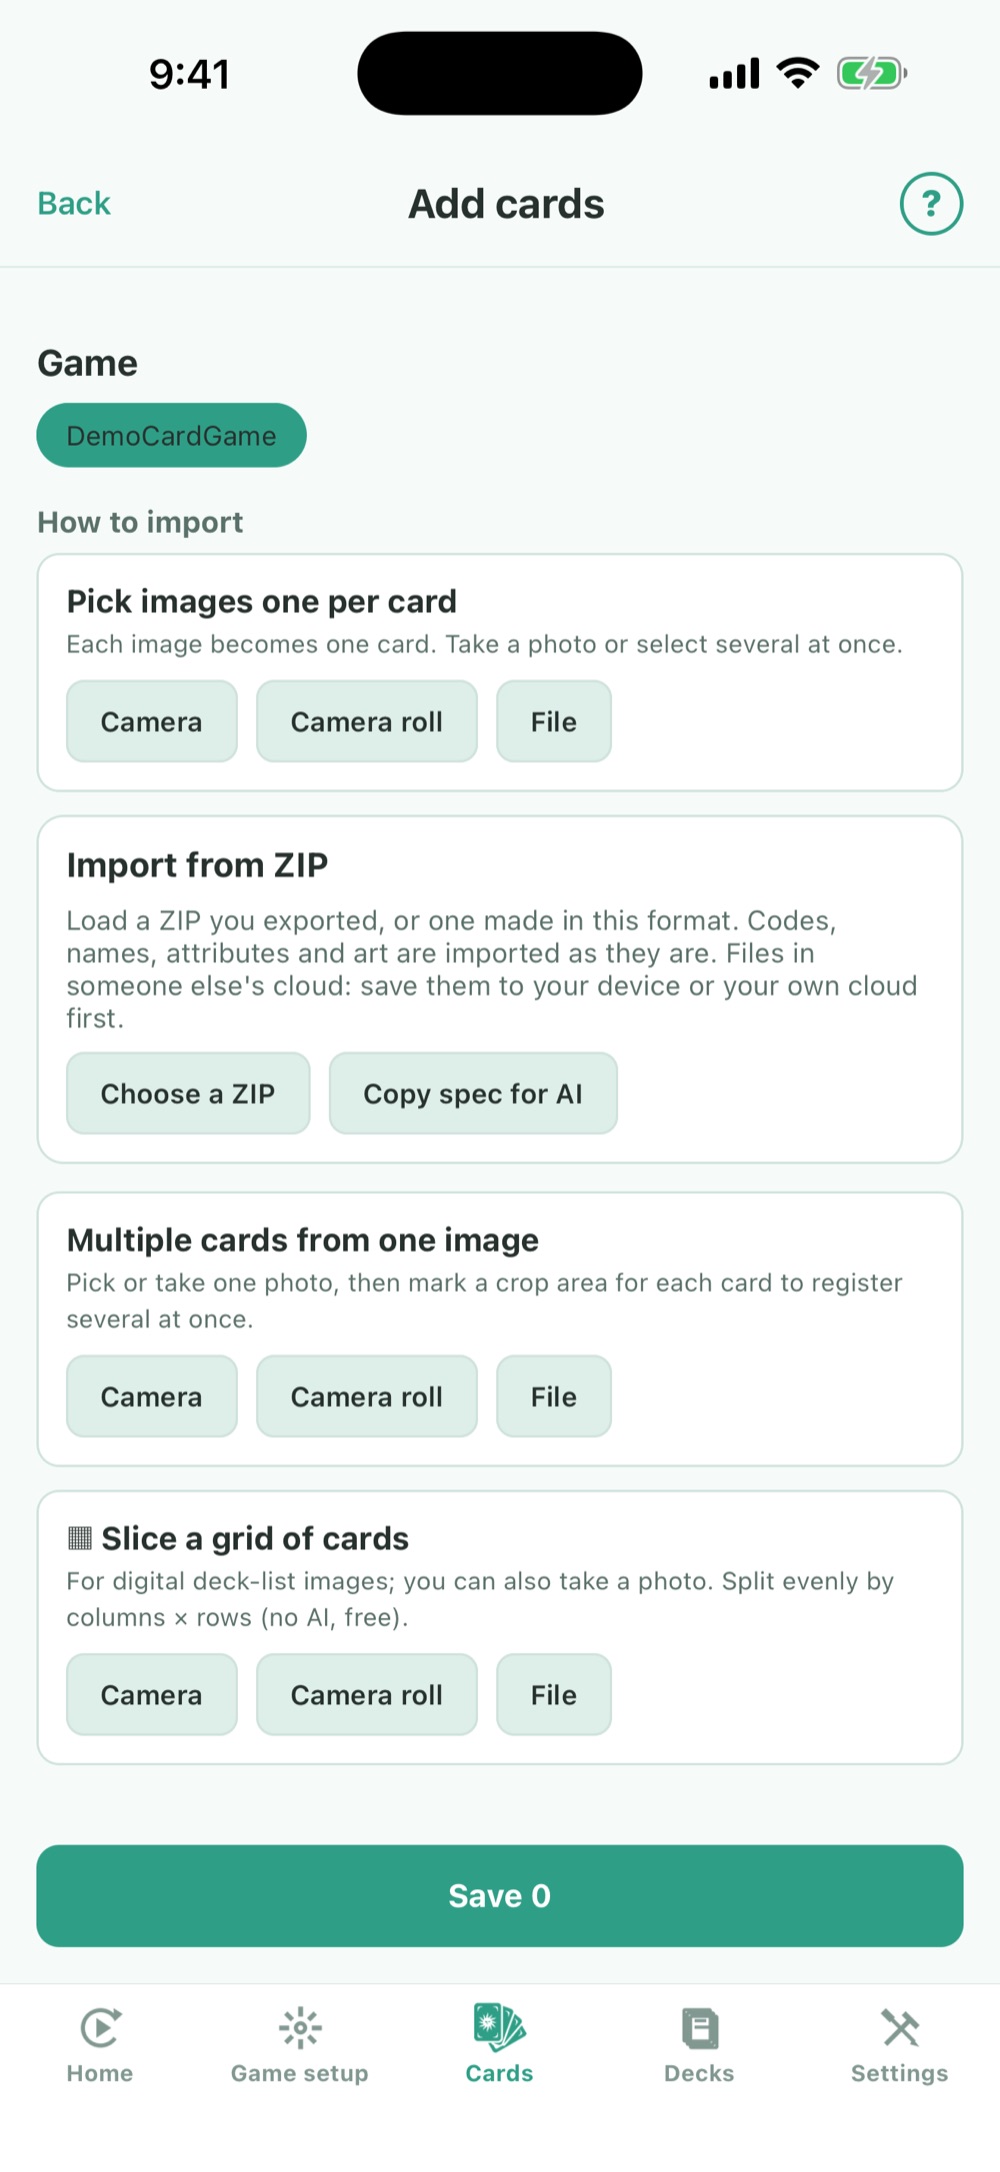
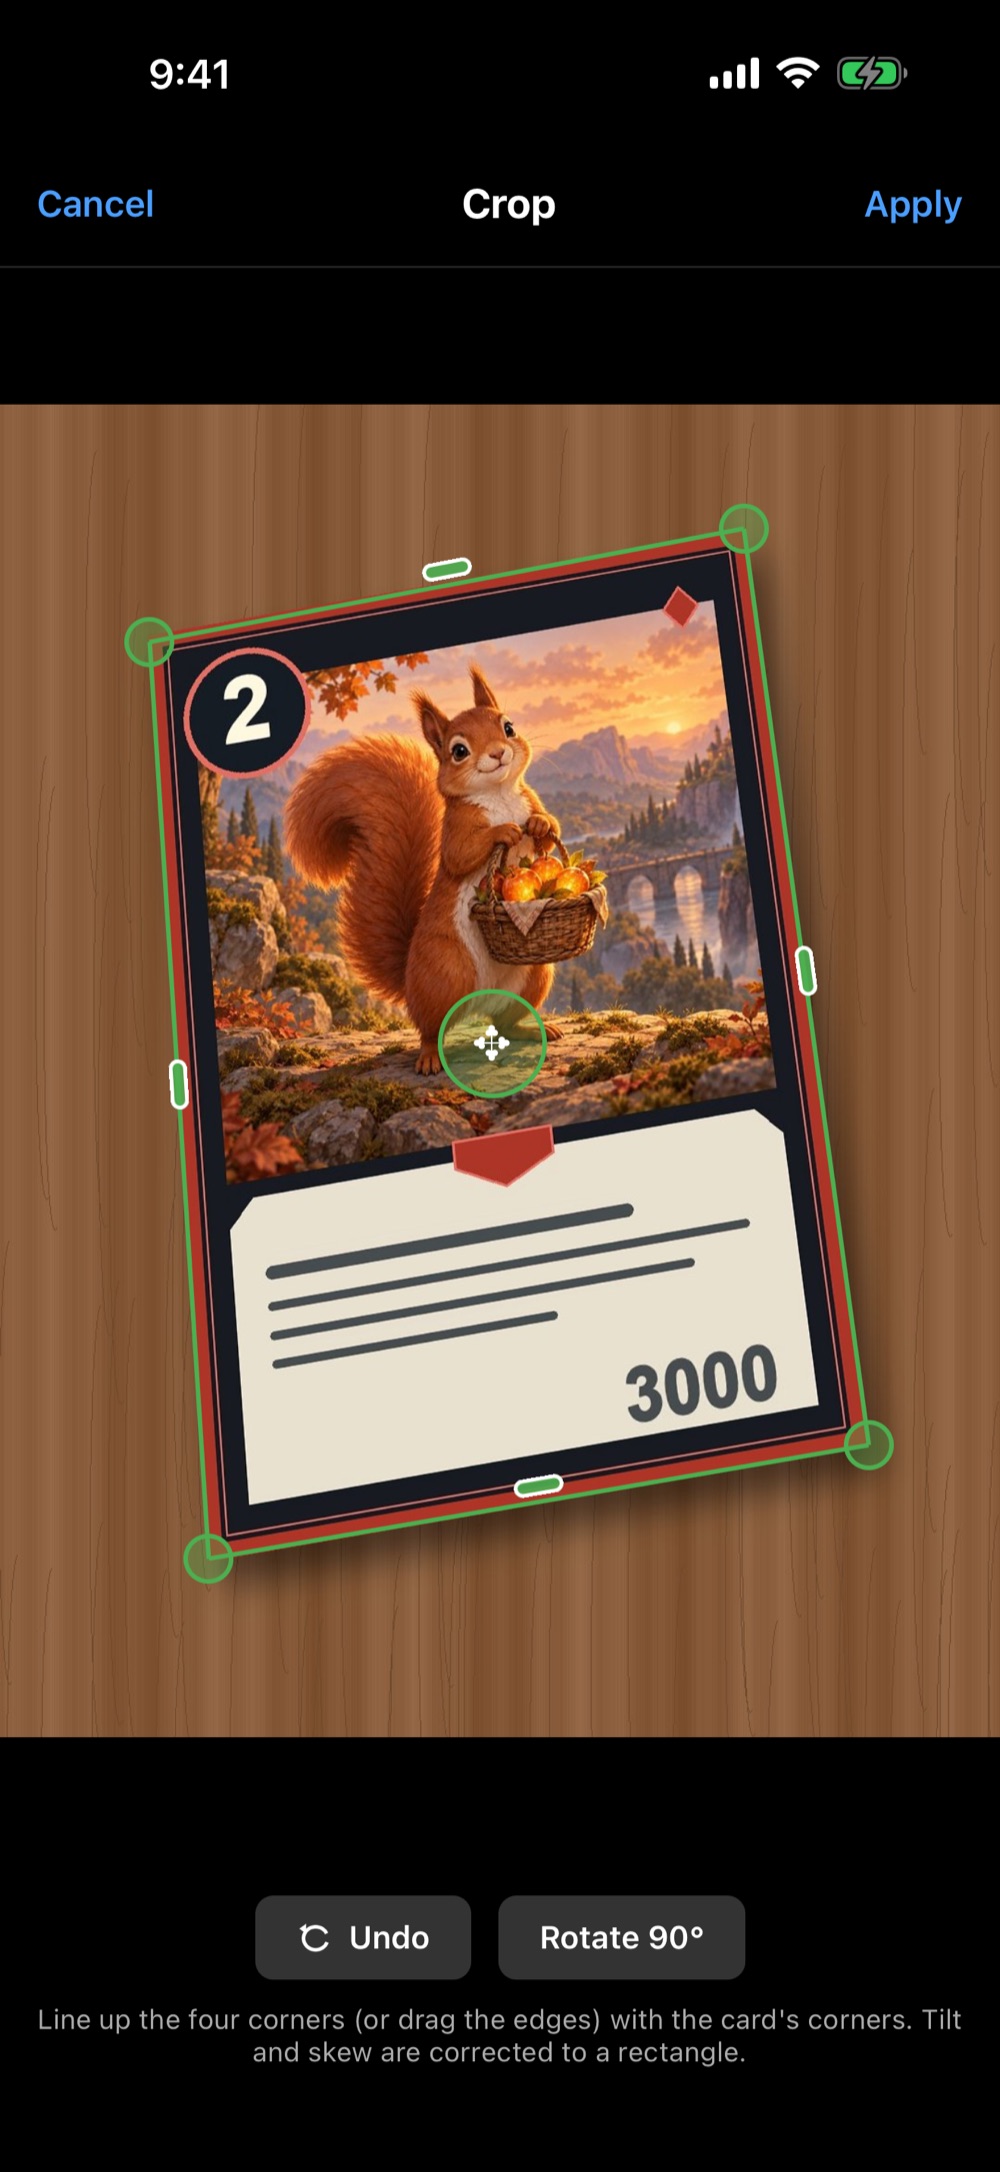
Tap an image to enlarge it. The screens are demos for explanation.
Image autofill is optional. If you use it, check the points shown on screen, review the result, then save. You can also enter everything by hand.
Alternate art of the same card
When you register a card with the same set number as an existing one, or with no set number and the same name, you are asked what to do. Choose "Add as alternate art" to keep it as one card with an extra image (the attributes you entered are not used). To make it a separate card, choose "Save as a separate card". When importing in bulk, you can choose "Alt art", "Separate" or "Skip" for each draft row.
You can also add images from "Alternate art" on the edit screen of a registered card, and choose which image to show there. Cards with alternate art get a badge such as "+1" in the list.
3B. Register a card ZIP someone made
- Get a card ZIP in TCG-T format and save it to your device or a cloud location you can open.
- In the game you are adding to, open "+ Add" → "Choose a ZIP". On Android, you can also pick a folder where the ZIP was extracted with "Choose a folder (unzipped)".
- Check the game name, count and any warnings. To add to a game you already made, choose the selected game.
- Check how missing attributes and duplicate set numbers are handled, import, and save the drafts.
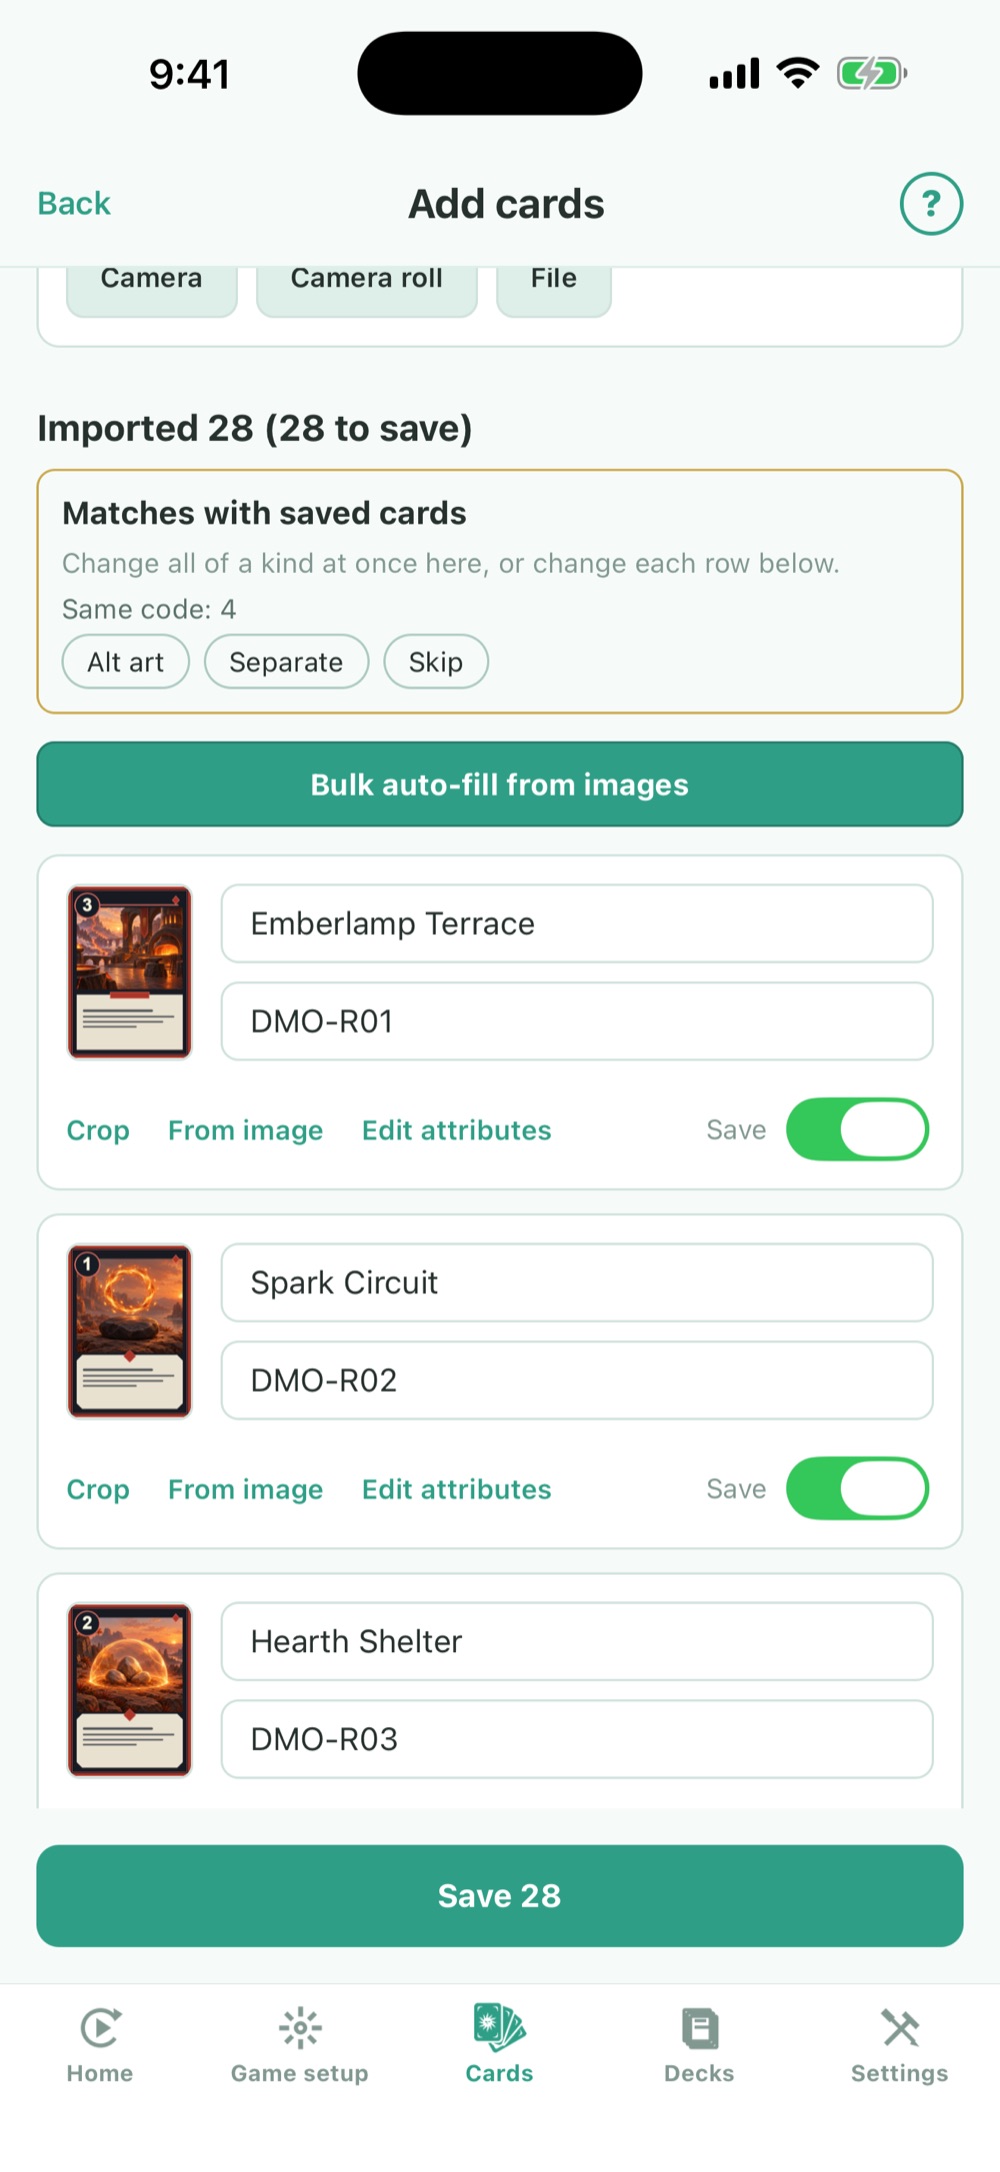
Tap an image to enlarge it. The screens are demos for explanation.
4. Once your cards are in
Check that images and names show up in the card list. From here, the steps are the same however you registered your cards.
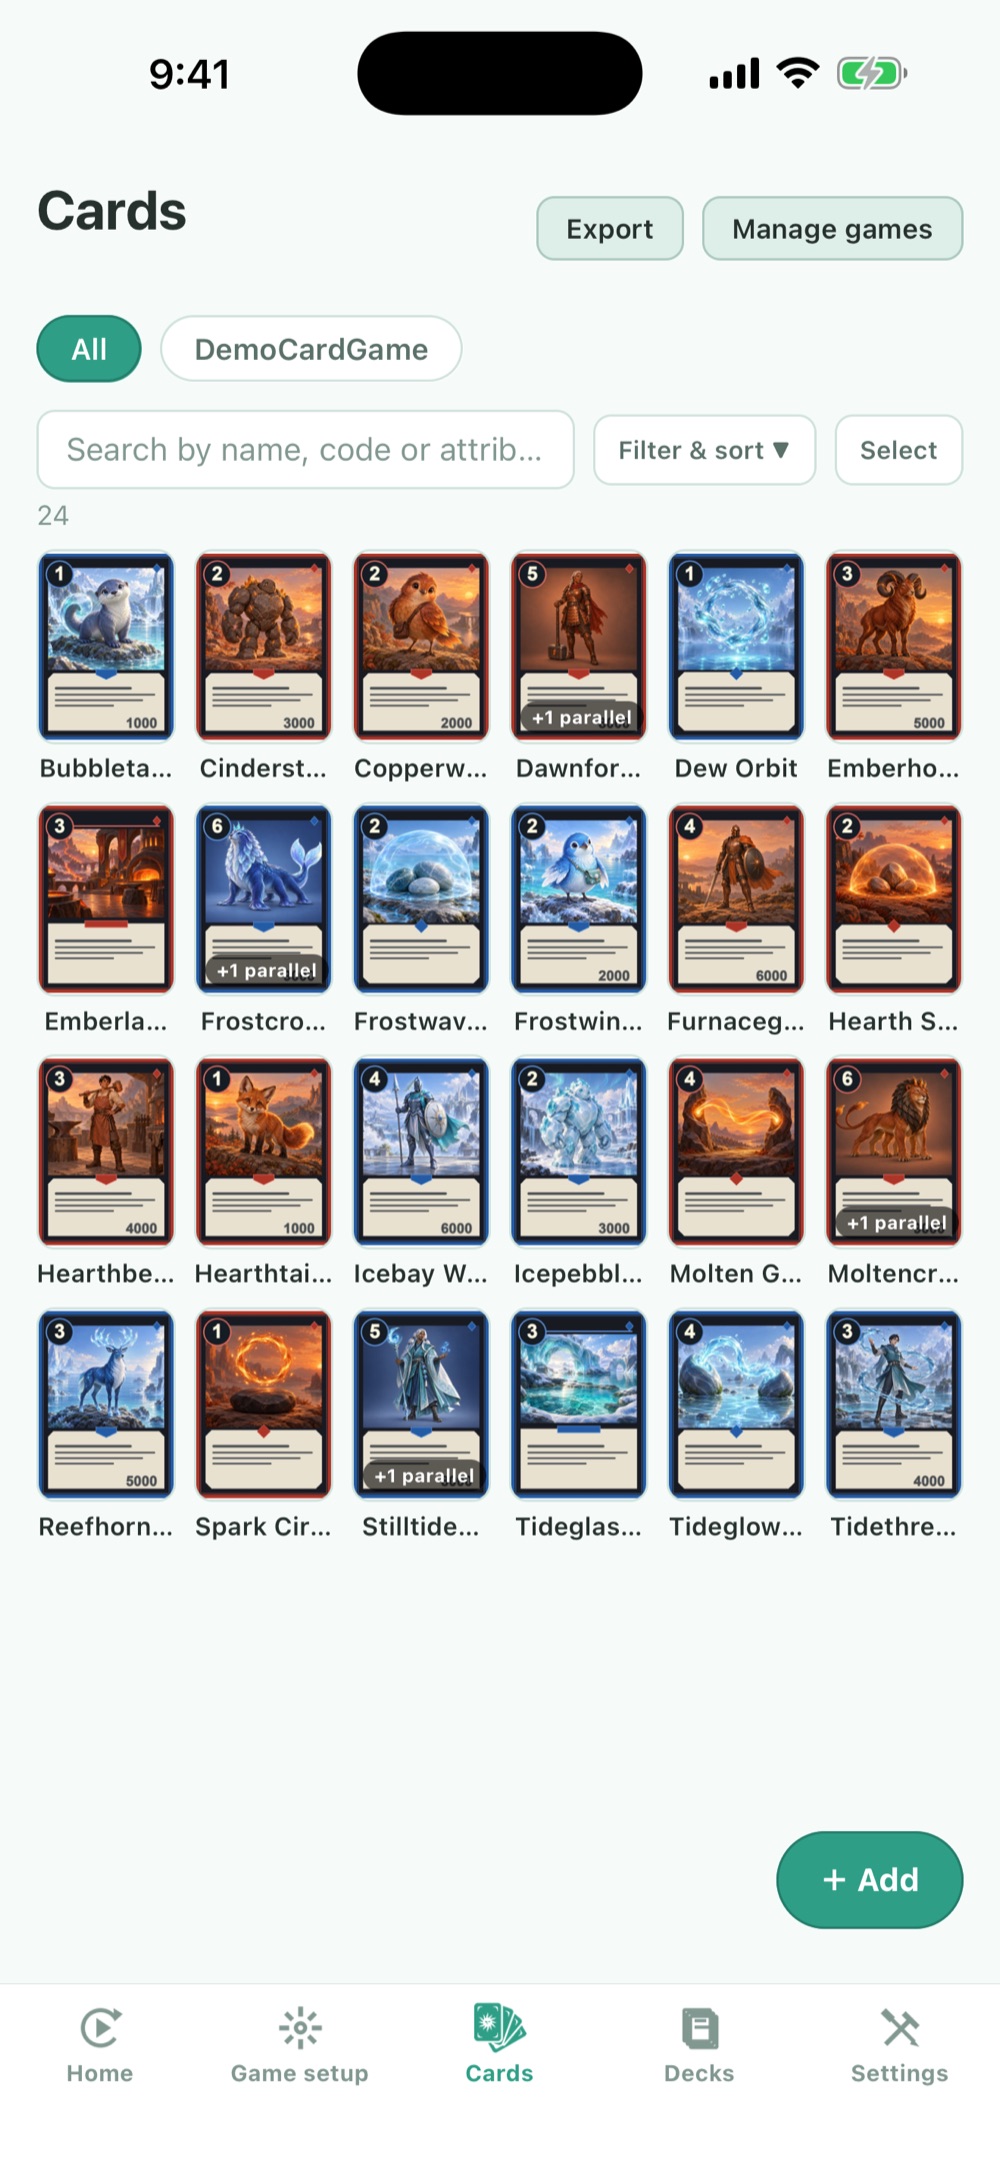
Tap an image to enlarge it. The screens are demos for explanation.
| What you want to do | How |
|---|---|
| Search | Type a name, set number or attribute value into the search box at the top. |
| Filter and sort | Open "Filter & sort". Filter by choice or number attributes, and sort by name, set number or attribute. |
| Act on several cards | Tap "Select" or long-press a card to select several. You can move them to another game with "Change game", or delete them. |
| View or fix a card | Tap a card to open the enlarged image and attributes, where you can edit or delete it. |
Cards deleted in bulk cannot be restored. If they were in a deck, they are also removed from that deck.
5. App settings
Under "Settings" at the bottom of the screen, you can:
| Item | What you can do |
|---|---|
| Language | Japanese, English, Chinese, Korean, Spanish, French, Portuguese, or follow the device setting. |
| Color theme | Choose from six color schemes for the whole app (Decorations guide). |
| Show the intro again | Review the guide shown when you first opened the app. |
| Points & Premium | Check your balance and history, buy, and restore purchases (Pricing, points and Premium). |
| Account | Sign in with Apple (iOS) or Google to keep your points and decorations you exchanged for after changing phones. You can also sign out or use "Delete TCG-T account" here (Delete your account). |
| Share usage data | Turn sending anonymous usage data for improving the app on or off. Card contents, images and personal information are not sent. |
| Ad privacy settings | Redo your ad consent choices. Shown only in regions where it applies. |
| Support | Open this site's guide, contact, privacy policy and more. Your app version is also shown here. |
For an overview of points and Premium, and how to buy, restore or cancel, see Pricing, points and Premium.